Ricoh MP2001L
Firmware Update. D160/D161/D170. GDI (Printer/Scanner)
An SD card is used to update the controller firmware.
- Setup a folder on the SD card, "model name”(E.g., "D161").
- Rename the update file to“D161*****.brn”, and save under the relevant folder on the SD Card.
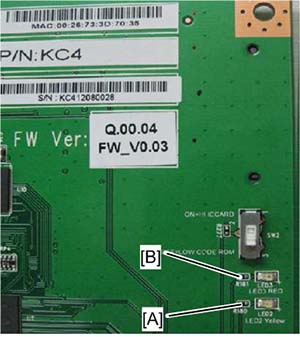
• The name of the new firmware saved in the SD card should be made up of numbers ‘0’ to ‘9’ or characters “A” to “Z”. E.g., “D16103A34.brn” is correct, “D161_03A4.brn” is incorrect. - Remove the slot cover [A]

- Insert the SD card into SD Card Slot 2 [B]. Make sure the label on the SD card faces the front side of the machine.
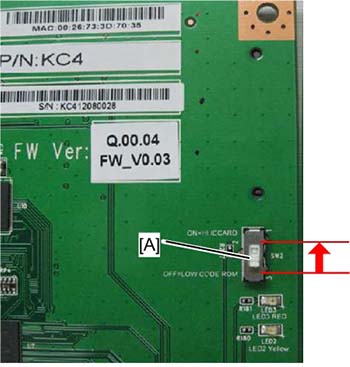
- Turn the update switch (SW2) [A] on.
- Turn the main power switch. "Please wait…" appears.
- Press the "OK" key
- Press “Execute”. Update will start.
- After update is finished, turn off the main power, switch SW2 to OFF, and unplug the SD card.
- Turn on the main power, then the new firmware will be working.
Note:
- During firmware update, there is no LED indication (no lighting).
- When update is finished, A Yellow LED [A] flashes if the update was OK or a Red LED [B] if the update failed.