Ricoh D259 MP305plus SPF
Adjustment after Replacement. Scanning
Note
▪ Image adjustment is required after clearing memory or replacing or adjusting the partsshown below.
▪ First scanner or second scanner
▪ Lens block
▪ Scanner motor
▪ Polygon motor
▪ Paper tray
▪ Side paper guides
▪ To access or use the SP mode, refer to page 4-1 "Service Program Mode".
- Before doing the following scanner adjustments, check and adjust the printing leading-edge and side-to-side registrations and the printing blank margins (as described above).
- Use an A3 test chart to perform the following adjustments.
Main Scan Magnification
- Use SP2-109-001, no. 7 (Grid Pattern 1, dotted line) to print the single-dot grid pattern.
- Check the magnification (grid size 2.7 x 2.7), and adjust the magnification using
SP2-102-001 (Magnification Adjustment Main Scan) if necessary. The specification is 100 ± 1%.
Example:
(1) Measure 20 grid units in main scanning with the scale
(2) Check that the measured value is 54 mm ± 1% (53.46 to 55.54 mm). If the value is outside of the specified range, adjust it using SP.
Registration: Platen Mode
- Place the test chart on the exposure glass and make a copy from one of the feed stations. Use the test chart of SP2-109-001 (Internal test pattern, pattern selection) No. 14.
- Check the leading edge and side-to-side registration, and adjust as necessary with the following SP modes.
| SP No. | SP Name | Specification |
|---|---|---|
| SP4-010-001 | Side-to-side registration | 0 ± 1 mm |
| SP4-011-001 | Leading edge registration | 0 ± 2 mm |

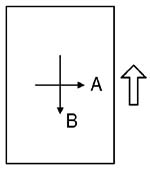
A: Leading edge registration
B: Side-to-side registration
Sub-Scan Magnification
A: Main scan magnification
B: Sub-scan magnification
- Place the OS-A3 test chart on the exposure glass and make a copy from one of the feed stations.
- Check the magnification ratio. If necessary, adjust the magnification with the following SP mode.
| SP No. | SP Name | Specification |
|---|---|---|
| SP4-008-001 | Sub-scan magnification | ± 1.0% |