OKI CX2033MFP
Self-diagnostic mode. Switch scan test
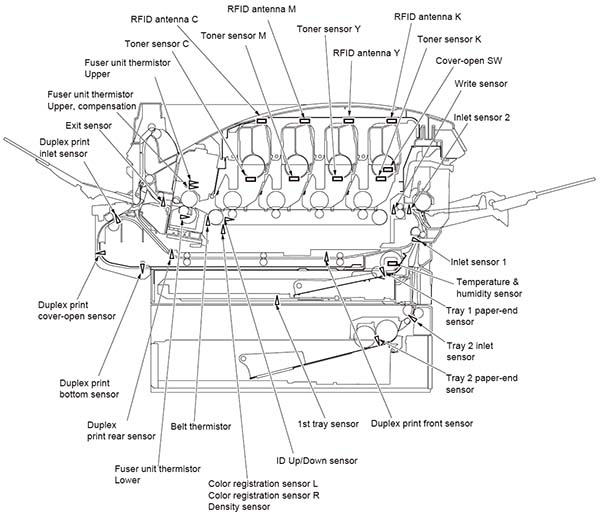
This self-diagnosis is practiced to check the inlet sensors and switches.
- Activate the self-diagnostic mode (Level 1), press and hold down the MENU+ or MENU- key, until "SWITCH SCAN" appears in the upper line of the display section, and then, press the ENTER key. (The MENU+ key increments a test item, and the MENU- key decrements a test item.)
- Press and hold down the MENU+ or MENU- key, until the item corresponding to the unit of Table 5-3 now to be tested appears in the lower line of the display section. (The MENU+ key increments a test item, and the MENU- key decrements a test item.)
- Pressing the ENTER key initiates the test, and the name and current status of the corresponding unit are displayed.
Note)
Pressing and holding down (2 sec) the [ENTER] key when a motor is decided causes the motor to keep running.
Conduct this operation on each unit (Figure 6-1). The indications are produced in the corresponding LCD display. (The indications vary from one sensor to another. See Table 6-3 for details). - Pressing the CANCEL key restores the status of Item 2 above.
- Repeat Items 2 to 4, as needed.
- To end the test, press the BACK key. (The status of Item 1 will be restored).