-
Catalog
-
Sign In
-
Contacts
-
Forum
-
Eng
Konica-Minolta bizhub C3350
Troubleshooting. Image Quality Problem. Scanner system 1
How to identify problematic part
- This chapter is divided into two parts: “Initial check items” and “Troubleshooting procedure by a particular image quality problem.”
- When an image quality problem occurs, first go through the "Initial check items" and, if the cause is yet to be identified, go to "Troubleshooting procedure by a particular image quality problem."
Initial check items
- Let the machine produce a test print and determine whether the image problem is attributable to the scanner or printer system.
- Evaluation procedure
| Action |
Result |
Cause |
| From [Service Mode], select [Test Mode] -> [Gradation Pattern], and produce a test print. Is image problem evident? |
YES |
Printer |
| NO |
Scanner |
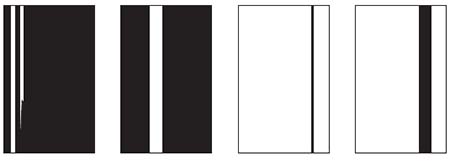
Scanner system: white lines, white bands, black lines and black bands in sub scan direction
Troubleshooting procedure
| Step |
Section |
Check item |
Result |
Action |
| 1 |
Original |
Original is damaged or dirty. |
YES |
Change original. |
| 1-Side |
| 2 |
ADF |
Original pad is dirty. |
YES |
Clean. |
| 3 |
Original glass |
Original glass is dirty. |
YES |
Wipe the surface clean with a soft cloth. |
| 4 |
Service Mode -> Machine -
> Scanner Area -> Scanner Image Side Edge |
The adjustment value for [Service Mode] -> [Machine] -> [Scanner Area] -> [Scanner Image Side Edge] falls within the specified range. |
NO |
Readjust. |
| 5 |
|
The problem has been eliminated through the checks of steps up to 4. |
NO |
Replace the scanner unit. |
| 2-Sided |
| 6 |
When ADF is being used: 2nd side |
CIS reading section is dirty. |
YES |
Clean. |
| 7 |
|
The problem has been eliminated through the checks of steps up to 6. |
NO |
Replace the ADF. |
Scanner system: white lines, white bands, black lines and black bands in main scan direction
Troubleshooting procedure
| Step |
Section |
Check item |
Result |
Action |
| 1 |
Original |
Original is damaged or dirty. |
YES |
Change original. |
| 1-Side |
| 2 |
ADF |
Original pad is dirty. |
YES |
Clean. |
| 3 |
Original glass |
Original glass is dirty. |
YES |
Wipe the surface clean with a soft cloth. |
| 4 |
Service Mode -> Machine -
> Scanner Area -> Image Position: Leading Edge |
The adjustment value for [Service Mode] -> [Machine] -> [Scanner Area] -> [Image Position: Leading Edge] falls within the specified range. |
NO |
Readjust. |
| 5 |
|
The problem has been eliminated through the checks of steps up to 4. |
NO |
Replace the scanner unit. |
| 2-Sided |
| 6 |
When ADF is being used: 2nd side |
CIS reading section is dirty. |
YES |
Clean. |
| 7 |
|
The problem has been eliminated through the checks of steps up to 6. |
NO |
Replace the ADF. |
Scanner system: black spots
Troubleshooting procedure
| Step |
Section |
Check item |
Result |
Action |
| 1 |
Original |
Original is damaged or dirty. |
YES |
Change original. |
| 1-Side |
| 2 |
ADF |
Original pad is dirty. |
YES |
Clean. |
| 3 |
Original glass |
Original glass is dirty. |
YES |
Wipe the surface clean with a soft cloth. |
| 4 |
|
The problem has been eliminated through the checks of steps up to 3. |
NO |
Replace the scanner unit. |
| Replace MFPB. |
| 2-Sided |
| 5 |
When ADF is being used: 2nd side |
CIS reading section is dirty. |
YES |
Clean. |
| 6 |
|
The problem has been eliminated through the checks of steps up to 5. |
NO |
Replace the ADF. |