HP Color LaserJet Managed E65060
Service mode. Format Disk
CAUTION: After executing a Format Disk option, the printer is not bootable.
Characteristics of a Format Disk
- Customer-defined settings, third-party solutions, firmware files, and the operating system are deleted.
NOTE: Rebooting the printer does not restore the firmware files. - Rebooting the printer restores the firmware files from the Repository location, but does not restore any customer-defined settings.
- After executing the Format Disk function, the message 99.09.67 displays on the control panel.
- After executing the Format Disk function, the printer firmware must be reloaded.
CAUTION: HP recommends not using the Format Disk option unless an error occurs and the solution in the
printer service manual recommends this solution. After executing the Format Disk function, the printer is
unusable.
HP recommends backing-up printer configuration data before executing a Format Disk to retain customerdefined
settings (if needed). See the Backup/Restore item in the Device Maintenance menu.
Reasons for performing a Format Disk
- The printer continually boots up in an error state.
NOTE: Try clearing the error prior to executing a Format Disk. - The printer will not respond to commands from the control panel.
- Executing the Format Disk function is helpful for troubleshooting hard disk problems.
- To reset the printer by deleting all solutions and customer-defined settings.
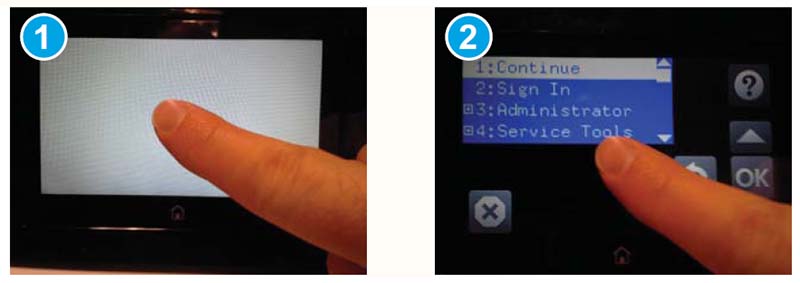
Execute a Format Disk from a touchscreen control panel
CAUTION: This procedure resets all printer configurations and settings to factory defaults (customer configurations and settings are lost).

- Touch the middle of the control-panel display when you see the 1/8 under the logo.
- Use the down arrow ▼ button to highlight the +3:Administrator item, and then touch the OK button.
- Use the down arrow ▼ button to highlight Format Disk, and then touch the OK button.
- Touch the OK button again.
NOTE: When the Format Disk operation is complete, reload the printer firmware.
Execute a Format Disk from a LCD control panel
CAUTION: This procedure resets all printer configurations and settings to factory defaults (customer configurations and settings are lost).
- Press the Cancel button when you see the 1/8 under the logo.
- Use the down arrow ▼ button to highlight the +3:Administrator item, and then press the OK button.
- Use the down arrow ▼ button to highlight Format Disk, and then press the OK button.
- Press the OK button again.
NOTE: When the Format Disk operation is complete, reload the printer firmware.