Toshiba e-Studio 4505AC
Adjustment. Auto-Toner Sensor
When the developer material is replaced, adjust the auto-toner sensor in the following procedure. If the value of FS-08-2707 (toner density ratio manual offset control) of the replacing developer material has been changed from "0" (default), return the sub code value of the corresponding color to "0".
- Install the cleaner unit and developer unit.
Notes: Do not install the toner cartridge. - Perform FS-05. The following message will be displayed.
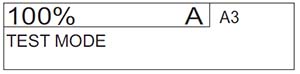
- Key in a code and press the [START] button.
Code 2400: All developer materials
2401: Developer material Y
2402: Developer material M
2403: Developer material C
2404: Developer material K
2406: Developer material YMC - The message below will be displayed approx. 2 minutes later and the adjustment starts:
• During the adjustment, “Current sensor voltage (V)” shown in (B) automatically changes and gradually approaches to “Target value (V) for adjustment reference voltage” shown in (A).(B): Current sensor voltage (V)
(C): Adjustment value, Humidity (%)
(A): Target value (V) for adjustment reference voltage - When the “Current sensor voltage (V)” in (B) is converged and the “Sensor output control value (bit value)” corresponding to the value for initial developer material is displayed in (C), the adjustment is completed.
• When the adjustment is completed, [OK] is displayed on the screen.(B): Current sensor voltage (V)
(C): Adjustment value, Humidity (%)
(A): Target value (V) for adjustment reference voltage
Notes: The values in (A), (B) and (C) vary with humidity. - Press [OK] to store the adjustment result in the memory.
- Turn the power OFF and install the toner cartridges.
Notes:
When "Waste toner box replacement" is displayed at adjustment, follow the steps below.
<When “Waste toner box replacement” is displayed>
1. Replace the waste toner box with a new one and close the front cover.
2. Key in [4833] (Recovery from toner empty/waste toner full).
3. Check that “WAIT” is displayed.