Toshiba e-Studio 855
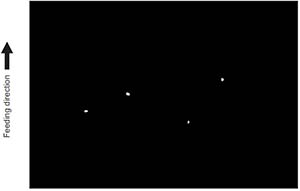
Troubleshooting. Image. 13 Black banding (at right angle with the feeding direction), White spots
13.Black banding (at right angle with the feeding direction)

| Defective area | Step | Check items | Prescription |
|---|---|---|---|
| Fuser unit | 1 | Is the fuser roller dirty? | Clean them. |
| 2 | Has the cleaning roller, pressure roller, fuser roller and separation finger for fuser roller reached their PM life? | Replace them. | |
| High-voltage transformer (Main charger / Developer bias / Transfer charger) | 3 | Is the high-voltage transformer output defective? | Replace the transformer. |
| Drum | 4 | Is there a deep scratch on the drum surface? | Replace the drum if the scratch has reached the aluminum base. |
| Scanner | 5 | Is there a foreign matter on the carriage rail? | Remove the foreign matter. |
14.White spots
| Defective area | Step | Check items | Prescription |
|---|---|---|---|
| Toner empty | 1 | Is the toner supply symbol lighting? | Replace the toner cartridge. |
| 2 | Is the toner cartridge installed properly? | Check the installation state of the toner cartridge. | |
| 3 | Is the performance of the new toner supply motor normal? | Check the performance of the new toner supply motor. | |
| 4 | Is the toner cartridge normal? | Check the toner cartridge. Replace if it is not normal. | |
| Decreasing toner density | 5 | Is the Auto-toner sensor connected correctly? | Check the connection of the connector of the Auto-toner sensor. |
| 6 | Is the toner density low? | Correct the toner density. (Note 2: See 'Toner density correcting method'.) | |
| Developer material/Toner/ Photoconductive drum | 7 | Using the specified developer material, toner and photoconductive drum? | Use the specified developer material, toner and photoconductive drum. |
| 8 | Have the developer material and the photoconductive drum reached their PM life? | Replace the developer material and photoconductive drum. | |
| 9 | Is the storage environment of the toner cartridge 35°c or less without dew? | Use the toner cartridge stored in the environment within specification. | |
| 10 | Is there any dent on the surface of the photoconductive drum? | Replace the drum. | |
| 11 | Is there any film forming on the photoconductive drum? | Clean or replace the drum. | |
| Main charger | 12 | Is there any foreign object on the charger? | Remove it. |
| 13 | Is the charger dirty or deformed? | Clean or replace the main charger wire and grid. | |
| Main charger output | 14 | Is the setting value proper? Is the main charger output normal? |
Replace the high-voltage transformer with a new one and print out a test chart. If any abnormal image appears, check the harness connection between the LGC board and the high-voltage transformer, power supply and stain on the main charger wire. |
| Developer bias output | 15 | Is the setting value proper? Is the developer bias output normal? |
Replace the high-voltage transformer with a new one and print out a test chart. If any abnormal image appears, check the harness connection between the LGC board and the high-voltage transformer, power supply and stain on the main charger wire. |
| Transfer belt | 16 | Is there any foreign object or fiber, etc. on the belt surface? | Remove it. |
Note:
1. Toner density correcting method Change the setting value 'Toner density life correction setting (08-414)' (6 is the default setting.)
0: Appox. 0.75% lower than the current value
1: Appox. 0.50% lower than the current value
2: Appox. 0.25% lower than the current value
3: The current value (Default setting)
4: Appox. 0.15% higher than the current value
5: Appox. 0.25% higher than the current value
6: Appox. 0.50% higher than the current value
7: Appox. 0.75% higher than the current value
Caution for correction
<Caution for correction> When increasing or decreasing the toner density too much, the image may become poor or the life of developer material, cleaner, photoconductive drum and fuser unit, etc. may shorten. Therefore it is not recommended to correct (to shift) the toner density basically. If it is shifted, make sure that the image may be improper in a few minutes after shifting.