Toshiba e-Studio 357
Adjustment. Auto-Toner Sensor
When the developer material is replaced, adjust the auto-toner sensor in the following procedure.
Note: Check if the cleaning blade is pressed against the drum before performing this adjustment.
Procedure (Adjustment Mode (05-2000))
- Install the into the equipment.
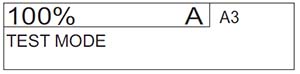
- While pressing [0] and [5] simultaneously, turn the power ON. The following message will be displayed.
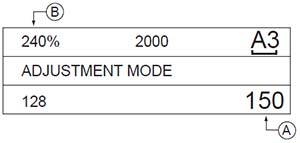
- Key in code [2000] and press the [START] button. The display changes as follows.
Notes:

• A indicates the controlled value of the auto-toner sensor output.
• B indicates the output voltage of the auto-toner sensor (2.30 V in the above case). The drum, developer unit, etc. are in operation.
• C indicates the latest adjustment value - After about two minutes and 30 seconds, the value B automatically starts changing.
- After a short time, the value B becomes stable and the display changes as follows.
- Press the [OK] or [INTERRUPT] button. The drum, developer unit, etc. are stopped and the
following is displayed.
The drum, developer unit, etc. are stopped and the following is displayed. - Standard of adjustment value range
Humidity(%) Adjustment reference voltages (V) 0 to 29.9 2.46 30.0 to 44.9 2.48 45.0 to 59.9 2.50 60.0 to 74.9 2.64 75.0 to 100 2.78 - Key in code [2120] and press the [START] button. When the message “WAIT” goes off, turn the power OFF by shutdown.
- Install the toner cartridge.