Ricoh M120 SP300DN RN-P1L
Service Mode. Smart Organizing Monitor
Overview
SOM (Smart Organizing Monitor) is a utility which can check the status of a printer and set up a printer from a PC. This utility is executed from a printer driver.
Printer Driver Installation (USB Connection)
- Close all applications currently running.
- Check the following:
• The printer's USB cable is disconnected
• The printer's main power switch is turned off - Insert the CD-ROM into the CD-ROM drive. The installer starts.
- Select the interface language, and then click [OK].
- Click [DDST Printer Driver] or [PCL 6 Printer Driver]. The software license agreement appears.
- After reading the agreement, click [I accept the agreement.], and then click [Next >].
- In the [Method to install printer driver] dialog box, clear the [Search for network printers.] check box, select the [Connect a printer using a USB cable.] check box, and then click [Next >].
- Select this printer, and then click [Next >]. A message appears, asking you to check that the USB cable is not connected and that the printer's main power switch is turned to off.
- Check the USB cable and the printer status, and then click [Next >].
- When the [<Auto-detect USB Port>] dialog box appears, connect this printer to the computer using a USB cable, and then turn the printer's main power switch on. USB auto detection begins.
- When the dialog box asking you to use this printer as the default printer appears, click either key.
- When a message appears informing you that the installation was successfully completed, click [Finish].
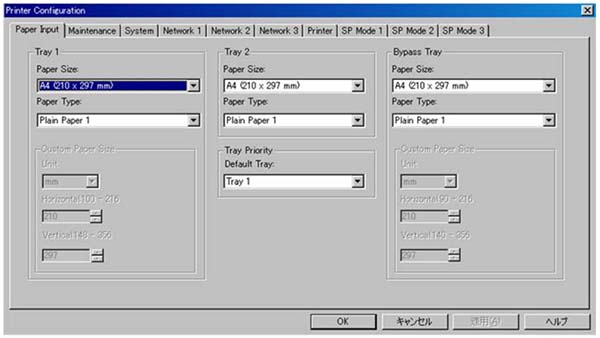
Entering the Printer Configuration
To enter the service system setting:
- Start the SOM utility.
- Click the "User Tools" tab.
- Click "Printer Configuration".
- The "Access Code" entry dialog appears.
- Input the access code (for customer engineers).
- Click the "OK" button.
- The "Printer Configuration" GUI appears.